
A gut renovation turns your home into a construction site, and drywall dust, stray paint, and contractors hauling ladders don’t mix well with a leather sofa or your grandmother’s dresser. Storage during a renovation is how New Yorkers keep their furniture and belongings out of harm’s way while the work happens, then bring everything back unscathed. This guide covers what to move out versus cover in place, how to dust-proof what stays, the right unit size and rental length for a NYC remodel, and when climate control earns its cost. Moishe’s has stored New Yorkers’ belongings for more than 30 years, so the advice here reflects what actually protects a home mid-project.
Quick answer: Storage during a renovation means moving your furniture and belongings into a secure off-site unit while contractors work, protecting them from dust, debris, moisture, and accidental damage. For a NYC remodel, a 5×10 to 10×15 unit rented month-to-month usually covers a room or two, with climate control recommended for wood, electronics, and upholstery.
Why You Need Storage During a Renovation
Storage during a renovation matters for one blunt reason: a renovation is dustier, longer, and riskier to your belongings than most people plan for. Kitchen remodels alone average about five months of active work on top of roughly nine months of planning (Houzz, 2024) — and anything left in the work zone spends that whole stretch absorbing fine dust and dodging tools.
The money at stake is real, too: U.S. homeowners were projected to spend roughly $485 billion on renovations in 2024, with the median kitchen project reaching $24,000 (Houzz, 2024). NYC apartments make it harder, not easier — there’s rarely a spare room to shuffle a bedroom set into, and sanding or demolition sends dust through the whole unit via the HVAC system. Moving belongings off-site gives your contractor room to work and takes your furniture out of the scratch-and-spill zone entirely. Storage during a renovation is the simplest way to make sure a project that improves your home doesn’t quietly damage what’s already in it — which is a big part of why New Yorkers choose Moishe’s during a remodel.
One more reason to move belongings out is liability. If a crew damages a sofa or a laptop sitting in the work zone, sorting out who pays gets messy, and homeowner’s policies often exclude items damaged during construction. Photographing everything and moving it into storage during a renovation sidesteps that fight entirely — your belongings are documented and out of reach of the work.
What to Move Out vs. Cover in Place
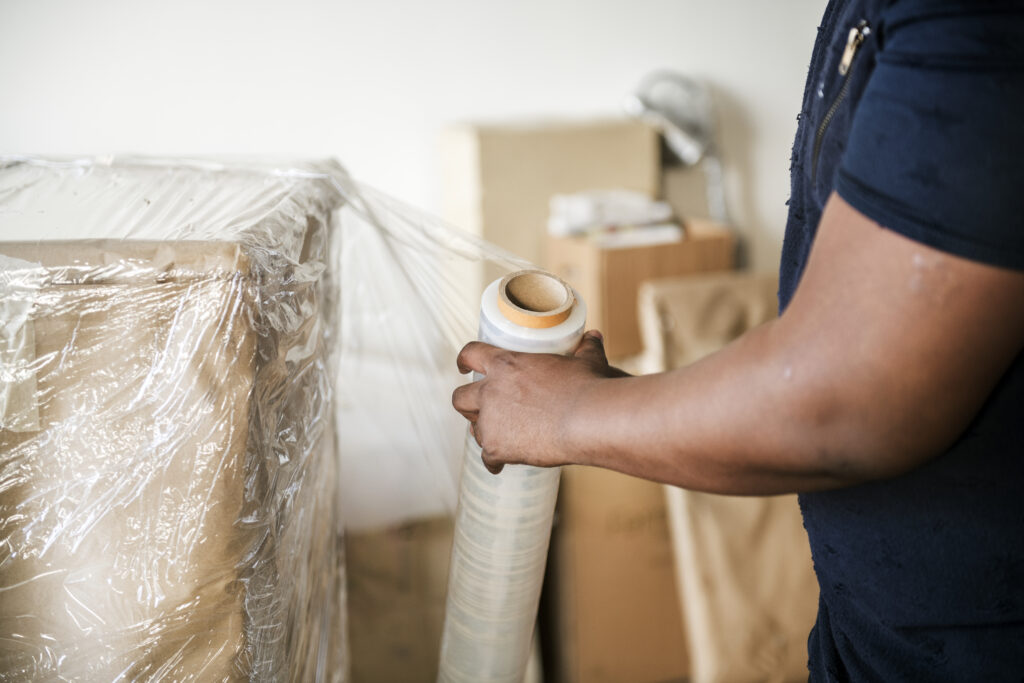
The first decision in any storage during a renovation plan is what leaves and what stays: move out anything in or next to the work zone, anything fragile, and anything hard to clean, and cover in place only sturdy items well away from the action. The bigger and dustier the project, the more that should leave the apartment entirely.
A whole-home, kitchen, or bathroom renovation calls for clearing the space completely — contractors need the room, and demolition dust travels. A single-room repaint might only need furniture pulled to the center and covered. Prioritize moving out glassware, ceramics, artwork, electronics, and upholstered furniture, since fabric and leather trap dust and are expensive to restore. With a median kitchen remodel running $24,000 and a bathroom $15,000 (Houzz, 2024), the contents deserve the same care as the construction budget. Larger pieces and delicate items are exactly what an off-site unit handles best — see furniture storage for how to store them without damage. Before anything leaves, photograph each piece and note existing wear — it takes ten minutes, gives you a clean record for any insurance claim, and makes moving everything back after the renovation far simpler.
How to Protect Furniture From Renovation Dust
Whatever stays in the apartment needs real protection, and the most common mistake is sealing furniture in plastic. Here’s the method that actually works:
- Clean everything first. Dust and oils left on fabric or leather etch in over a months-long project, so wipe pieces down before you wrap or store them.
- Use breathable covers, not sealed plastic. Airtight plastic traps moisture against the surface and invites mold; breathable fabric covers or moving blankets let pieces breathe. A layer of moving blankets under stretch wrap (about $15 at Home Depot) protects against both dust and scratches.
- Seal the room. Hang plastic sheeting over doorways and cover or shut HVAC vents so demolition dust doesn’t ride the ductwork into the rest of the apartment.
- Box and label small items. Pack fragile pieces in sturdy, labeled boxes and store them upright, away from the zone.
- Mind lead in older buildings. In any NYC home built before 1978, sanding and demo can release lead dust — use an EPA Lead-Safe Certified (RRP) contractor and keep belongings and people out of the area (EPA).
Anything you can’t reliably protect this way — or simply don’t have room to store safely at home — belongs in renovation storage off-site until the dust settles.
What Size Unit and How Long to Rent
Two questions decide your storage during a renovation: how big a unit, and how long. Match the unit to the number of rooms you’re clearing and the length to your contractor’s timeline, plus a buffer, because renovations run over. A studio or single room usually fits a 5×10; one to two rooms fit a 10×10; a multi-room or whole-apartment clear-out needs a 10×15.
On timing, rent month-to-month rather than committing to a fixed term. A kitchen alone averages five months of active work (Houzz, 2024), and change orders and permit delays stretch that further, so a flexible rental keeps you from paying past your reopening date or scrambling for an extension. Free pickup matters for renovation storage more than usual, since you’re moving a household’s worth of furniture without a truck or a free weekend — see Moishe’s specials and free pickup. To size the space to your exact room count, the storage size guide walks through what fits in each unit for your renovation storage.
Climate Control and Security for a Multi-Month Store

For renovation storage that spans a NYC summer or winter, climate control is the difference between furniture that comes back the way it left and furniture that warps, cracks, or grows mildew. Wood, leather, electronics, and artwork are all sensitive to the temperature and humidity swings a non-conditioned space allows; the EPA recommends keeping indoor humidity below 60% to limit mold (EPA), which a climate-controlled unit does automatically.
Security matters for a months-long renovation storage, too. Look for 24/7 video surveillance, on-site staff, and individually locked units so your belongings are as protected in storage as they’d be at home — and for month-to-month access, so you can grab a tool box or a lamp mid-project without penalty. Moishe’s runs climate-controlled, secure units with free pickup and month-to-month terms across its NYC locations — the same protection behind climate-controlled storage and secure storage.
Your Renovation Storage Timeline & Checklist

Good storage during a renovation is mostly about sequencing it with your contractor. Book the unit and schedule pickup a few days before demolition starts, not the morning of — you don’t want furniture in the apartment when the sledgehammers arrive. Work backward from the start date, add a two-to-four-week buffer for the overrun most projects hit, and choose month-to-month so the end date stays flexible.
A quick renovation storage checklist:
- 2–3 weeks out: inventory what’s leaving, photograph each piece, and reserve a unit sized to your room count.
- 1 week out: clean and wrap furniture, box and label fragile items, and confirm your pickup window.
- Demo day minus 2: move everything out so the work zone is clear and the crew can start on time.
- Mid-project: retrieve anything you need with a quick visit — a good facility gives you access to your renovation storage throughout.
- Reopening: schedule delivery back once the dust has settled and the finishes have cured.
Handled this way, renovation storage becomes a background task instead of a moving-day scramble.
Frequently Asked Questions
Do I need storage during a renovation, or can I just cover everything?
For a single-room repaint, covering sturdy furniture in place is usually fine. For a kitchen, bathroom, or whole-home renovation, move belongings off-site — contractors need the room, demolition dust travels through the whole apartment, and months of exposure damage upholstery, wood, and electronics. Off-site storage removes the risk entirely and speeds up the work.
What size storage unit do I need for a renovation?
It depends on how many rooms you’re clearing. A single room or studio typically fits a 5×10, one to two rooms fit a 10×10, and a multi-room or whole-apartment clear-out needs about a 10×15. When in doubt, size up slightly — packing furniture with breathing room prevents scratches and makes retrieval easier.
How long should I rent storage for a remodel?
Rent month-to-month and plan for longer than the quote. A kitchen remodel averages roughly five months of active work, and permit delays or change orders often add more. A month-to-month unit means you’re not locked into a fixed term or forced to scramble for an extension if the project runs past its original end date.
Should I use plastic or breathable covers on furniture?
Use breathable covers. Sealed plastic traps moisture against wood, leather, and fabric, which invites mold and mildew over a multi-month store. Moving blankets or breathable furniture covers protect against dust while letting pieces breathe; if you use stretch wrap for dust, put a moving blanket underneath so the plastic never sits directly on the finish.
Is climate-controlled storage worth it during a renovation?
For anything longer than a few weeks, or any store that spans summer heat or winter cold, yes. Wood warps, leather cracks, and electronics corrode when temperature and humidity swing. Climate-controlled units hold a steady environment and keep humidity below the level where mold forms, which protects the exact items a renovation forces you to move.
Protect the Home While You Improve It
A renovation should add value, not cost you the furniture you already own — and storage during a renovation is how you make sure of it. The essentials:
- Move out anything in or near the work zone, plus fragile and upholstered pieces.
- Protect what stays with breathable covers and moving blankets — never sealed plastic.
- Size the unit to your room count (5×10 to 10×15) and rent month-to-month for a timeline that will run over.
- Choose climate control and security for a multi-month store through NYC seasons.
- Use free pickup so you’re not moving a household by hand.
Planning a remodel? Get your storage during a renovation sorted early — see why Moishe’s and explore Moishe’s Self Storage in NYC, or call (800) 536-6564 — with climate-controlled, secure units, month-to-month terms, and free pickup, your belongings stay safe until the project’s done.